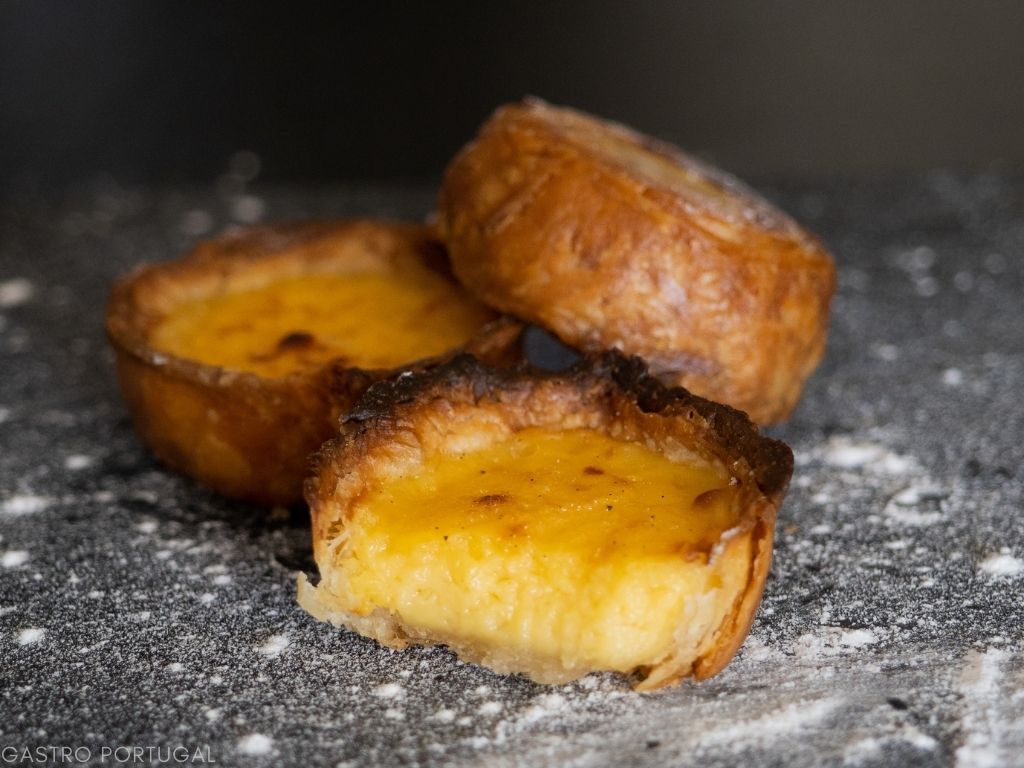
A Pastel de Nata or Portuguese Custard Tart is, simply, a sweet pastry that combines puff pastry and custard. The ingredients used to concoct them are the puff pastry, milk, egg yolks, sugar, cinnamon, and sometimes lemon peel. Despite having the word nata (meaning cream) in its name, traditionally, no cream is required. They are very popular here in Portugal and quite easy to find in bakeries, coffee shops, and supermarkets.
My Pastel de Nata Obsession
When I first visited Portugal, in 2014, I developed an obsession with pastéis de nata. I was determined to try them at every pastelaria I came across. I went even further and created a personal rank – who had the best crust, the tastier custard and who best combined both elements. If you have tried this Portuguese classic before, you will possibly relate to this story. For those that haven’t experience the deliciousness of a pastel de nata, you are missing one of the best things in Portugal.

The Origins of the Pastéis de Nata
The creation of this classic pastry is linked to the Hieronymites Monastery in Belém. Not only the pastéis de nata but several other pastries in Portugal were created to reduce the waste of egg yolks in the convents. During the 15th century it was common for the nuns and monks to use egg whites for starching their clothes. At the same period, after the colonization of Madeira Island, refined sugar started to gain popularity in Portugal. Resulting in the creation of multiple pastries in the convents across the country, which all share the classic golden colour of the egg yolks, locally known as Doces Conventuais (Convent Sweets). No wonder they say almost every pastry in Portugal was created by a monk – pastel de nata is no exception.
Pastéis de Nata and Pastéis de Belém
Some of you might be familiarized with the Portuguese custard tarts being called ‘Pastéis de Belém’. In fact, in some parts of Brazil we mistakenly refer to every pastel de nata as a pastel de Belém. While a pastel de Belém is a pastel de nata, not every pastel de nata can be called pastel de Belém! To make things a bit clearer, a pastel de Belém is an exclusive name for the pastries made in a particular bakery that goes by the same name as the pastries. Pastéis de Belém is who holds the original recipe and the rights to produce and sell the sweets.

About the Recipe
For this recipe, I decided to make my own puff pastry instead of using store-bought. Making home made puff pastry can be a laborious task, but I promise you, it is very rewarding to see all the layers form when you bake your tarts. Plus, most store-bought pastries are made with palm oil and not butter, so the taste will be very different too. For the custard, I used vanilla beans, but you can swap it with vanilla paste or extract. It is also important to use full fat milk and good quality eggs.
This recipe will make about 24 units, which can vary according to the size of your tin. Once baked, they can be stored in the freezer and reheated in the oven. They still taste delicious and this way you will have pastéis ready to go next time you have a craving for them.
How to Make Pastéis de Nata from Scratch

Pastéis de Nata – How to Make Portuguese Custard Tarts
24
servings1
hour15
minutes15
minutes235
kcalPastéis de Nata are traditional Portuguese custard tarts made with puff pastry and egg custard.
Ingredients
- Pastry Ingredients
300 g All-purpose flour + extra for dusting
225 g Unsalted butter – room temperature
200 ml Water
1/4 tsp Fine salt
- Custard Ingredients
300 ml Full-fat milk
220 g Caster sugar
6 Medium egg yolks
30 g All-purpose flour
160 ml Water
1 Cinnamon stick
1/2 Vanilla bean
1/2 Lemon – the peel
Directions
- Making the Puff Pastry
- In a bowl, combine the flour, water, and salt. Use your fingers or a mixer with a dough hook to blend everything until the mixture starts pulling away from the sides of the bowl.
- Transfer it to a floured surface. If necessary, use a spatula to scrape it out of the bowl. At this stage, the dough should be a bit sticky. Add an extra dusting of flour on top of it, then wrap it in cling film. Let it rest for 20 minutes.
- Once the time has passed, it is time to start with the laminating process. Add some more flour to your surface and make sure you have plenty of space to work. Use a rolling pin or similar to roll the dough into an approximately 45 cm (18 inches) square.
- Use a light brush to brush excessive flour off the square of dough. With a small spatula spread evenly 1/3 of the butter on 2/3 of the dough. Leave a 2cm border in order to prevent the butter from leaking during the next steps.
- Fold the third of dough left unbuttered over the middle third. At this stage you can use a dough scrapper to help loosen the dough which may stick to the surface. Make sure you brush off any excess of flour from the dough. Fold the remaining third on top of the rest of the dough.
- Turn the folded dough 90 degrees to the left. You should be facing the last fold. Repeat the process where you roll out the dough into an 45cm square and spread another 1/3 of butter over 2/3 of the dough as even as possible. Repeat the folding process as explained before.
- Rotate the folded dough 90 degrees to the left, repeat the rolling process. This time you will make an approximate 45×50 cm rectangle. With the shorter side facing you, spread the rest of your butter over the entire dough.

- The next step is to make a roll with the dough. Use the scrapper to lift the edges before rolling it, and the brush to remove excessive flour that might sit on top of the dough. You should end up with a tightly rolled pastry log. Wrap it in cling film and put it in the fridge for at least 4 hours, or overnight.

- Making the Custard
- Add the flour and 50ml of milk to a large bowl, whisk it together until smooth, set aside.
- In a small pan, add the caster sugar, cinnamon stick, and the water. Place it over medium heat. Cook until it reaches 100°C. In case you don’t have a kitchen thermometer, you can observe the consistency of the syrup. Carefully dip a spoon into the hot mixture, when you lift it and the syrup falls in a large drop leaving a short and thin string behind, it should be ready.
- Meanwhile, in a separate pan, bring the remaining milk to a boil. Remove it from the heat, then add the lemon peel, and the vanilla pod – use a knife to open the pod and release its seeds before you add both the pod and seeds to the milk. Cover the mixture with a lid and let it infuse for about 5 minutes. Add the infused milk into the flour and milk mixture you made at the beginning.
- Pour the sugar syrup into the infused milk mixture while you stir, keep stirring it until it becomes a little cooler. Add in the egg yolks, whisk well, then strain the mixture into a jug. Cover it with a cloth and set aside.

- Making the Pastéis de Nata
- Pre heat the oven to 290 °C or to the hottest temperature your oven can reach
- Remove your pastry from the fridge, cut the edges off, then cut your pasty log in half. Each half should make approximately 12 pastéis, as my cake tin has only 12 slots, I will be making them in 2 batches. Put one of the halves back in the fridge.
- Slice your half log into 12 equal slices, place each slice cut side down in each slot of your tin, let it rest for 10 minutes to soften.
- Use your thumbs to shape the dough. Press it against the bottom of the tin and then smooth the dough up to the sides, creating a raised lip above the pan. This dough is easier to work with wet fingers so keep a cup with water next to you. Be careful as the bottom should not be too thin.
- Fill each cup ¾ full with the custard. Bake the pastéis until the edges are golden brown, around 15-17 minutes. If your oven has a grill mode, turn it after 10 minutes to achieve the distinctive burnt effect of your typical pasteis de nata.

- Remove them from the oven and let them cool for a few minutes before serving. They should be served while still warm, and they taste even better with a dusting of cinnamon on top.

Notes
- If you don’t feel like making home made puff pastry, you can use store-bough and start from step 8.
- To flavour the custard we won’t use lemon zest, but strips of the lemon peel that can be easily pulled out before you bake the tarts.
- The vanilla bean can be replaced with 1/4 tsp of vanilla extract.
Do you have a favourite pastry in Portugal? Let me know in the comments and maybe it will be my next recipe!